How to Season a Blackstone Grill: 9 Expert Steps for a Perfect Nonstick Surface
Key Takeaways
- Seasoning creates a durable, natural nonstick coating that improves cooking performance.
- A properly seasoned Blackstone grill helps prevent rust and extends the life of the griddle.
- Applying several thin layers of high-smoke-point oil works much better than one thick coat.
- New Blackstone griddles should always be seasoned before cooking your first meal.
- Regular maintenance and light oiling after each cook help preserve the seasoning and reduce future maintenance.
How Do You Season a Blackstone Grill?
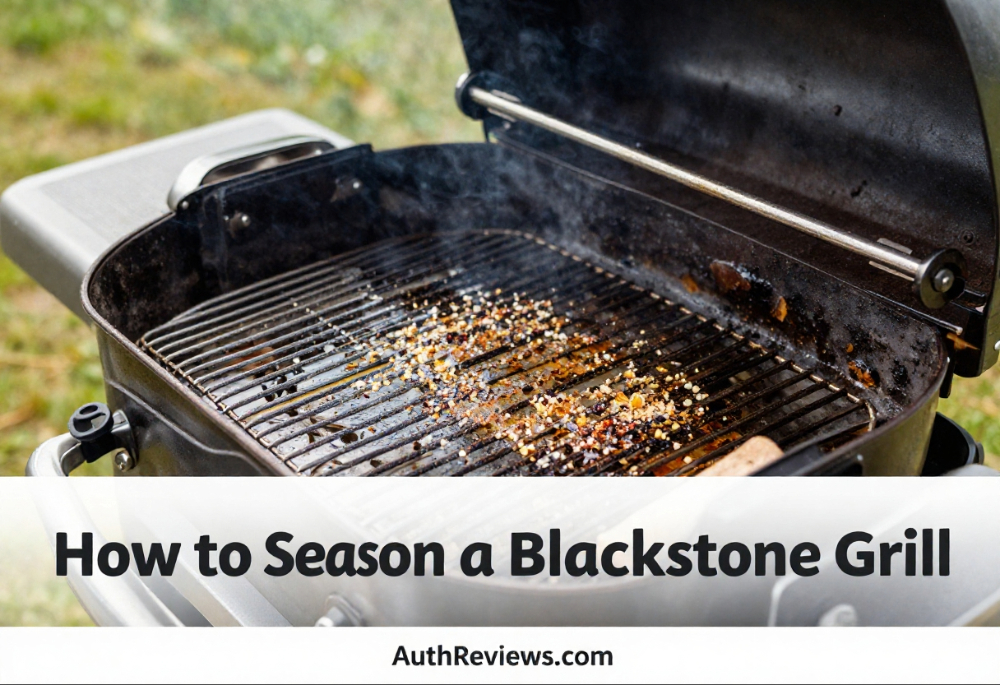
To season a Blackstone grill, heat the griddle until it’s very hot, apply a thin layer of high-smoke-point oil, spread it evenly across the cooking surface, and allow it to smoke until the oil burns off. Repeat this process several times until the surface develops a dark brown or black finish. Proper seasoning creates a natural nonstick coating, helps prevent rust, and improves cooking performance over time.
Introduction: How to Season a Blackstone Grill the Right Way
The first time I bought a Blackstone griddle, I couldn’t wait to cook burgers.
I unpacked it, assembled it, admired that shiny steel cooking surface…and then paused.
“Wait… I have to season this thing first?”
Like many first-time owners, I assumed seasoning was optional. Thankfully, I decided to spend a few extra minutes reading the instructions before firing it up.
That turned out to be one of the smartest decisions I made.
Seasoning isn’t just another preparation step—it’s what transforms a plain steel cooking surface into the slick, naturally nonstick griddle that Blackstone owners rave about. Skip it, and you may end up with sticking food, uneven cooking, or even surface rust.
The good news?
Seasoning a Blackstone grill is surprisingly simple once you understand the process. You don’t need expensive products or years of grilling experience. All it takes is the right oil, a little patience, and a few thin coats applied correctly.
In this guide, I’ll walk you through everything you need to know, from choosing the best oil to avoiding the mistakes that many beginners (myself included) make during their first seasoning session.
What Does It Mean to Season a Blackstone Grill?
If you’ve never owned a flat-top griddle before, the word “seasoning” can sound confusing.
No, you’re not sprinkling spices on the cooking surface.
Instead, you’re creating a protective coating by heating a thin layer of oil until it chemically bonds to the steel. This process, called polymerization, forms a hard, durable layer that protects the griddle and improves its cooking performance.
Think of it as building a shield for your grill.
Each thin layer strengthens that shield.
How the Seasoning Process Works
When oil is heated past its smoke point, it begins to change.
Instead of remaining liquid, it bonds to the steel surface, creating a thin protective layer.
Repeat the process several times, and those layers build into the dark finish that experienced Blackstone owners love.
Over time, regular cooking adds even more seasoning, making the surface smoother and more naturally nonstick.
How Seasoning Creates a Natural Nonstick Surface
One question I hear often is:
“If the griddle is steel, why doesn’t food stick after seasoning?”
The answer lies in those bonded oil layers.
As multiple coats build up, they create a smoother cooking surface that allows foods like:
- Pancakes
- Eggs
- Burgers
- Vegetables
- Bacon
to release much more easily.
While it won’t feel exactly like a brand-new nonstick skillet, a well-seasoned Blackstone develops impressive food-release properties over time.
Seasoning vs. Cleaning: What’s the Difference?
Many new owners confuse these two terms.
Here’s a simple comparison.
| Seasoning | Cleaning |
|---|---|
| Builds a protective oil coating | Removes food residue and grease |
| Helps prevent rust | Keeps the cooking surface sanitary |
| Improves nonstick performance | Maintains the existing seasoning |
| Performed before first use and as needed | Performed after every cook |
Both are essential.
Cleaning protects your seasoning.
Seasoning protects your grill.
Why You Should Season a Blackstone Grill
Some people wonder if they can skip seasoning and start cooking immediately.
Technically, you could cook on an unseasoned steel surface.
But after trying it once years ago, I wouldn’t recommend it.
Food sticks far more easily, cleanup takes longer, and the steel is much more vulnerable to moisture.
Seasoning solves all of those problems.
Prevents Rust and Corrosion
Blackstone griddles are made from steel.
Steel and moisture don’t get along very well.
Without a protective seasoning layer, exposure to humidity, rain, or even damp air can eventually lead to rust.
A properly seasoned surface acts as a protective barrier between the steel and moisture.
Improves Food Release
Nobody enjoys scraping half a cheeseburger off the griddle because it welded itself to the cooking surface.
As your seasoning improves, you’ll notice foods release more easily.
That’s especially helpful for:
- Eggs
- Pancakes
- Fish
- Hash browns
These delicate foods benefit from a smooth, well-seasoned surface.
Enhances Cooking Performance
Seasoning doesn’t just protect the steel.
It also helps the cooking surface perform more consistently.
Benefits include:
- Better browning
- More even cooking
- Easier flipping
- Less sticking
- Faster cleanup
Extends the Life of Your Blackstone Grill
A Blackstone isn’t a disposable appliance.
With proper care, it can provide years of reliable cooking.
Routine seasoning helps protect the steel from:
- Rust
- Surface wear
- Moisture damage
- Corrosion
It’s one of the simplest ways to protect your investment.
Builds Better Flavor Over Time
Experienced griddle owners often mention that their Blackstone seems to cook better after months of regular use.
They’re not imagining it.
As seasoning layers continue to develop through cooking and maintenance, the surface often becomes smoother and more efficient.
That’s one reason longtime owners are so protective of their well-seasoned griddles.
When Should You Season a Blackstone Grill?
Many people assume seasoning is a one-time task.
Actually, it’s an ongoing part of griddle ownership.
Fortunately, once the initial seasoning is complete, maintaining it becomes much easier.
Before the First Use
Every brand-new Blackstone griddle should be seasoned before cooking your first meal.
New griddles may have protective coatings or manufacturing residues that should be removed according to the manufacturer’s instructions before seasoning.
Starting with a proper seasoning creates the foundation for years of great cooking.
After Deep Cleaning
If you’ve stripped the cooking surface during an intensive cleaning or restoration, it’s time to season again.
Removing the protective coating means you’ll need to rebuild it.
After Removing Rust
Rust removal often strips away existing seasoning.
Once the rust is gone, treat the griddle almost like it’s brand new by applying multiple fresh seasoning coats.
After Long-Term Storage
If your Blackstone has been sitting unused for several months, inspect it carefully.
Look for:
- Rust spots
- Dry areas
- Flaking seasoning
- Surface discoloration
If the protective coating looks compromised, reseasoning may be a good idea before cooking again.
When the Surface Looks Dry or Patchy
Your griddle will usually tell you when it needs attention.
Common signs include:
- Uneven coloring
- Dry-looking steel
- Food sticking more than usual
- Small rust spots
- Dull gray patches
Addressing these issues early is much easier than restoring a severely neglected griddle.
Supplies You’ll Need Before You Start
One of the best things about seasoning a Blackstone is that you don’t need a garage full of specialty equipment.
Most of the supplies are inexpensive and easy to find.
High-Heat Cooking Oil
Choosing the right oil is one of the most important decisions you’ll make.
Good options include:
- Avocado oil
- Canola oil
- Grapeseed oil
- Flaxseed oil
- Vegetable oil
We’ll compare these oils in detail in Part 2.
Paper Towels or Lint-Free Cloths
You’ll use these to spread very thin layers of oil across the griddle.
Remember:
Thin coats are your friend.
Heavy coats usually create sticky seasoning.
Heat-Resistant Tongs
Tongs make it much easier—and much safer—to hold paper towels while spreading hot oil.
Trust me.
Burned fingertips are a lesson you only need once.
Grill Scraper
A quality scraper helps remove:
- Factory residue
- Burnt food
- Loose debris
without damaging the cooking surface.
Heat-Resistant Gloves
Working around a hot griddle deserves respect.
A good pair of gloves provides extra protection while handling hot tools or adjusting the cooking surface.
Water Bottle (Optional)
Some owners keep a squeeze bottle of water nearby to help loosen stubborn food residue during routine cleaning after cooking.
For seasoning, however, the griddle should be completely dry before applying oil.
My Biggest Tip Before You Start
If I could give every new Blackstone owner one piece of advice, it would be this:
Don’t rush the seasoning process.
The biggest mistake beginners make isn’t choosing the wrong oil.
It’s trying to finish too quickly.
Several thin coats will always outperform one thick, greasy layer.
Patience now means easier cooking and less maintenance later.
Choosing the Best Oil and How to Season a Blackstone Grill Step by Step
Now that you understand why seasoning is important, it’s time for the fun part—actually transforming that shiny steel griddle into a smooth, dark cooking surface.
If you’re anything like I was the first time, you’ll probably be tempted to pour on a generous amount of oil and hope for the best.
Don’t.
Ironically, using less oil usually produces better seasoning.
Thin, even coats are the secret to a durable finish that won’t become sticky or flaky.
Let’s start with one of the most common questions new Blackstone owners ask.
Choosing the Best Oil for Seasoning a Blackstone Grill
Walk into any grocery store and you’ll see shelves full of cooking oils.
Naturally, many people wonder:
“Does it really matter which one I use?”
The answer is yes.
Different oils have different smoke points, and that plays an important role in building a durable seasoning layer.
What Makes an Oil Good for Seasoning?
A good seasoning oil should have:
- A relatively high smoke point
- A mild flavor
- The ability to create a durable polymerized coating
- Easy availability
Fortunately, several common cooking oils work well.
Smoke Point Comparison
| Oil | Approximate Smoke Point | Good for Seasoning? |
|---|---|---|
| Avocado Oil | About 520°F | Excellent |
| Grapeseed Oil | About 420°F | Excellent |
| Canola Oil | About 400°F | Very Good |
| Vegetable Oil | Around 400–450°F (varies by blend) | Very Good |
| Flaxseed Oil | Around 225°F | Good (opinions vary among griddle owners) |
| Peanut Oil | About 450°F | Very Good |
Smoke points are approximate and can vary by product and refinement.
My Recommended Oils
If someone asked me to recommend only three oils for most Blackstone owners, I’d suggest:
Avocado Oil
Why I like it:
- Very high smoke point
- Creates a durable seasoning
- Widely available
Grapeseed Oil
Another excellent choice because it:
- Spreads easily
- Handles high heat well
- Produces consistent results
Canola Oil
Canola remains popular because it’s:
- Affordable
- Easy to find
- Effective for multiple seasoning coats
Oils to Avoid
While you can cook with many different fats, not all are ideal for initial seasoning.
For example:
- Butter burns quickly because of its milk solids.
- Extra-virgin olive oil has a lower smoke point than many recommended seasoning oils.
- Cooking sprays may contain additives that don’t produce the best seasoning layer.
Save those for cooking rather than building your initial seasoning.
Preparing Your Blackstone Grill Before Seasoning
Proper preparation makes the seasoning process much smoother.
Skipping these steps can reduce the quality of the finished surface.
Remove the Factory Protective Coating
Most new Blackstone griddles arrive with a protective coating designed to help prevent corrosion during shipping and storage.
Follow the manufacturer’s instructions to remove any protective residue before seasoning.
This usually involves cleaning the cooking surface thoroughly before heating it.
Clean the Cooking Surface
Before applying oil:
- Remove dust.
- Wipe away manufacturing residue.
- Remove packaging debris.
- Ensure the surface is clean.
A clean surface allows the seasoning to bond more effectively.
Dry the Griddle Completely
Moisture is the enemy of seasoning.
After cleaning:
- Wipe the surface dry.
- Allow any remaining moisture to evaporate.
- Make sure no water remains before adding oil.
Even small amounts of trapped moisture can interfere with seasoning.
Inspect for Damage
Before heating the grill, quickly check for:
- Shipping damage
- Loose hardware
- Surface scratches
- Obvious defects
It’s much easier to address issues before your first seasoning session.
How to Season a Blackstone Grill Step by Step
Now comes the part you’ve been waiting for.
Take your time.
There’s no prize for finishing quickly.
Step One: Heat the Griddle
Turn the burners on high.
Allow the cooking surface to heat thoroughly.
As the steel heats, you may notice it gradually changing color.
That’s perfectly normal.
Step Two: Wait Until the Surface Is Fully Hot
Patience matters here.
The steel should be hot enough that the oil reaches its smoke point almost immediately after application.
This is what begins the polymerization process.
Step Three: Apply a Very Thin Layer of Oil
This is where many beginners make their biggest mistake.
Don’t pour oil directly onto the entire surface.
Instead:
- Apply a small amount.
- Spread it immediately.
- Aim for the thinnest coat possible.
If the surface looks greasy, you’ve probably used too much.
Step Four: Spread the Oil Evenly
Using paper towels held with heat-resistant tongs, spread the oil across:
- The cooking surface
- The corners
- The edges
- The side walls (where appropriate)
Every exposed steel surface benefits from protection.
Take your time to ensure complete coverage.
Step Five: Allow the Oil to Smoke
Soon you’ll see smoke rising from the griddle.
That’s exactly what you want.
The smoke indicates the oil is reaching the temperature needed to bond with the steel.
Don’t panic if there’s quite a bit of smoke.
Seasoning is often a smoky process, especially during the first few coats.
If possible, perform the initial seasoning outdoors in a well-ventilated area.
Step Six: Let the Oil Burn Off Completely
Continue heating until the visible smoke slows significantly.
The oil should no longer appear wet.
Instead, the surface will begin developing a darker appearance.
Resist the temptation to add more oil too soon.
Allow each coat to finish before starting the next.
Step Seven: Repeat the Process
One coat isn’t enough.
Apply another very thin layer and repeat the process.
Most new Blackstone owners achieve good initial results by applying three to five thin coats, although the ideal number can vary depending on the condition of the surface and the results you’re seeing.
Each additional layer strengthens the seasoning.
Step Eight: Watch the Color Change
With each coat, the steel gradually changes from shiny silver to:
- Golden brown
- Dark brown
- Deep brown
- Nearly black
Don’t expect a perfectly uniform finish immediately.
Seasoning develops over time.
Step Nine: Let the Griddle Cool Naturally
Once you’ve completed the final coat:
- Turn off the burners.
- Allow the griddle to cool naturally.
- Avoid pouring water onto the hot surface.
Rapid cooling may stress the metal unnecessarily.
How Many Layers of Seasoning Should You Apply?
This is another question nearly every new owner asks.
The answer is refreshingly simple.
For a Brand-New Blackstone
Most people start with three to five thin coats during the initial seasoning.
Some experienced owners apply additional coats, but after several well-applied layers, regular cooking will continue improving the seasoning naturally.
More Isn’t Always Better
Adding ten heavy coats in one afternoon doesn’t necessarily produce a better surface.
Quality matters much more than quantity.
Focus on:
- Thin coats
- Even coverage
- Complete burn-off
Those three habits make the biggest difference.
What Should a Properly Seasoned Blackstone Look Like?
Don’t expect perfection after your first attempt.
Seasoning continues to improve with regular use.
Normal Color Changes
A healthy seasoning may appear:
- Brown
- Dark brown
- Black
- Slightly uneven
Small variations in color are completely normal.
Smooth Surface
Your griddle should feel:
- Dry
- Smooth
- Slick
It should not feel sticky.
Is Uneven Color Normal?
Absolutely.
One of the biggest surprises for new owners is that a freshly seasoned Blackstone rarely looks perfectly black from edge to edge.
That’s okay.
The surface becomes more uniform as you continue cooking foods like:
- Bacon
- Burgers
- Onions
- Vegetables
Every meal contributes to the seasoning.
A Mistake I’ll Never Make Again
During my very first seasoning session, I thought:
“More oil has to mean better protection.”
So I poured on a generous amount.
Instead of creating a beautiful finish, I ended up with a sticky mess that required extra work to correct.
That’s when I realized the golden rule of Blackstone seasoning:
Thin coats win every time.
Common Seasoning Mistakes, Maintenance Tips, Rust Removal, and Fixing Seasoning Problems
Congratulations—your Blackstone now has its first layers of seasoning.
But here’s something many new owners don’t realize:
Seasoning isn’t a one-and-done process.
Think of it like caring for a cast-iron skillet. Every time you cook and maintain it properly, the seasoning gets stronger. Neglect it, and the surface can quickly lose its protective coating.
The good news is that maintaining a Blackstone griddle is much easier than building the initial seasoning.
Let’s look at how to keep that beautiful cooking surface in top condition.
Common Mistakes to Avoid
I’ve made a few of these mistakes myself over the years, and judging by online forums, I’m definitely not alone.
Fortunately, they’re all easy to avoid once you know what to watch for.
Using Too Much Oil
This is probably the number one mistake.
It seems logical:
“More oil equals better seasoning.”
Unfortunately, the opposite is usually true.
Too much oil can leave the surface:
- Sticky
- Uneven
- Gummy
- Slow to cure
Instead, apply the thinnest layer possible.
If the surface looks wet, wipe away the excess before heating.
Turning Off the Heat Too Soon
Some people stop heating the griddle as soon as they see smoke.
Instead, allow the oil to continue smoking until it has largely burned off.
This helps create a stronger, more durable seasoning layer.
Skipping Multiple Coats
One quick coat rarely provides the protection a new griddle needs.
Applying several thin coats creates:
- Better rust resistance
- Improved food release
- Longer-lasting seasoning
Patience really pays off here.
Using the Wrong Oil
Low smoke-point oils may not perform as well during initial seasoning.
Choose oils designed to handle high temperatures.
We’ll recap the best choices:
- Avocado oil
- Grapeseed oil
- Canola oil
- Vegetable oil
- Peanut oil
Cooking Before Proper Seasoning
I understand the temptation.
You’re excited.
The burgers are ready.
But cooking before completing the initial seasoning often leads to:
- Sticking food
- Difficult cleanup
- Uneven seasoning
Spending an extra half hour now saves frustration later.
Leaving Moisture on the Surface
Water is one of the biggest enemies of carbon steel.
After cleaning:
- Dry the surface completely.
- Heat briefly if needed to evaporate remaining moisture.
- Apply a very light protective coat of oil before storage.
Those simple steps help prevent rust.
How to Maintain the Seasoning
Once the initial seasoning is complete, ongoing maintenance becomes surprisingly easy.
Most of it happens after each cook.
Clean the Griddle While It’s Still Warm
Cleaning a slightly warm griddle is usually easier than waiting until everything hardens.
Remove:
- Food residue
- Grease buildup
- Loose debris
A quality griddle scraper works well for this step.
Wipe the Surface Clean
After scraping:
- Use paper towels or a lint-free cloth.
- Remove remaining residue.
- Leave the cooking surface clean.
Avoid excessive water unless needed.
Apply a Thin Coat of Oil
Here’s the habit that separates long-time Blackstone owners from frustrated beginners.
After cleaning:
- Add a small amount of oil.
- Spread it into a very thin layer.
- Allow the residual heat to help protect the surface.
This simple routine takes only a minute or two.
Store the Griddle Properly
Whenever possible:
- Keep the griddle covered.
- Protect it from rain.
- Reduce exposure to humidity.
- Store accessories separately.
A quality cover can significantly extend the life of the seasoning.
How Often Should You Reseason a Blackstone Grill?
Fortunately, you usually don’t need to repeat the entire seasoning process very often.
Frequent Users
If you cook several times each week and maintain the surface properly, regular cooking naturally strengthens the seasoning.
Complete reseasoning may only be necessary if the surface becomes damaged or stripped.
Occasional Users
If your Blackstone sits unused for months, inspect it before cooking.
Look for:
- Rust
- Dry patches
- Flaking
- Sticky areas
If necessary, apply a fresh seasoning coat before your next cook.
After Deep Cleaning
Sometimes you’ll intentionally strip part of the seasoning while removing stubborn buildup or restoring the surface.
When that happens, rebuild the protective coating before cooking again.
After Rust Removal
Removing rust usually removes seasoning as well.
Treat the restored area much like a new griddle by applying several fresh seasoning coats.
How to Restore a Rusty Blackstone Grill
Discovering rust can be discouraging.
The good news?
Most surface rust can be removed with patience.
A rusty Blackstone isn’t necessarily ruined.
Step One: Remove Loose Rust
Use an appropriate griddle scraper or other suitable method recommended for carbon steel cooking surfaces to remove loose rust and debris.
Avoid damaging the cooking surface.
Step Two: Clean the Surface
After removing rust:
- Wipe away dust.
- Remove loose particles.
- Ensure the griddle is clean.
Step Three: Dry Completely
Before seasoning:
- Remove all moisture.
- Allow the surface to dry fully.
Any remaining water can interfere with the new seasoning.
Step Four: Reseason the Griddle
Now repeat the same seasoning process used for a brand-new Blackstone.
Apply several thin coats until the surface develops a healthy protective finish.
How to Fix Common Seasoning Problems
Every Blackstone owner eventually encounters a minor issue.
Fortunately, most have straightforward solutions.
Sticky Surface
What Causes It?
Usually:
- Too much oil
- Insufficient heating
- Thick seasoning layers
How to Fix It
Heat the griddle again to continue curing the oil.
If the problem is severe, you may need to clean the affected area and apply fresh, thinner coats.
Flaking Seasoning
Flaking usually indicates the seasoning wasn’t properly bonded.
Common causes include:
- Thick oil layers
- Contamination
- Inadequate heating
Remove loose seasoning and rebuild with multiple thin coats.
Uneven Color
This is one of the most common questions I see online.
Relax.
Uneven color is perfectly normal during the early stages.
Continue cooking.
The surface generally becomes more uniform over time.
Rust Spots
Small rust spots often result from:
- Moisture
- Long-term storage
- Missed maintenance
Address them early before they spread.
Food Sticking
If food begins sticking more than usual:
- Clean the surface thoroughly.
- Apply a light maintenance seasoning.
- Continue cooking foods that naturally help build seasoning.
Sometimes the griddle simply needs another thin coat.
White or Gray Areas
These lighter patches may appear after aggressive cleaning or prolonged storage.
A quick maintenance seasoning usually restores protection.
A Habit That Makes a Huge Difference
One thing I’ve noticed about experienced Blackstone owners is that they rarely spend hours restoring their griddles.
Why?
Because they spend two minutes maintaining them after each cook.
That tiny investment of time prevents most major problems.
It’s much easier to maintain good seasoning than to rebuild it from scratch.
Cooking After Seasoning, Best Foods to Build Seasoning, Expert Tips, and Maintenance Checklist
You’ve done the hard work.
Your Blackstone has several solid layers of seasoning, and you’re probably staring at it thinking the same thing I did:
“Can I finally cook on this thing?”
Absolutely.
In fact, one of the best ways to continue improving your seasoning is by cooking on it regularly.
Every meal adds another thin layer of protection to the cooking surface—as long as you clean and maintain it properly afterward.
Can You Cook Immediately After Seasoning?
Yes.
Once you’ve completed the initial seasoning process and allowed the griddle to cool, it’s ready for cooking.
Don’t expect the surface to look exactly like a Blackstone that’s been used every weekend for three years.
That rich, deep-black finish develops gradually.
The important thing is that you’ve created a strong foundation.
What to Cook First
Some foods naturally help strengthen the seasoning because they release a moderate amount of cooking fat.
Excellent choices include:
- Bacon
- Burgers
- Sausage
- Onions
- Mushrooms
- Bell peppers
These foods continue building the protective coating while giving you a delicious first meal.
Foods You May Want to Wait On
Very delicate foods may stick slightly during the first few cooks.
Consider waiting a little before making:
- Fried eggs
- Thin fish fillets
- Crepes
- Delicate pancakes
After several cooking sessions, these foods usually become much easier to prepare.
Best Foods for Building Seasoning
One of my favorite things about owning a Blackstone is that regular cooking improves the surface.
You’re literally making your grill better every time you use it.
Bacon
Bacon has become almost legendary among Blackstone owners.
It provides:
- Natural cooking fat
- Even coverage
- Excellent flavor
Just don’t rely on bacon alone.
A variety of foods helps create a more balanced seasoning over time.
Onions
Cooking sliced onions spreads a light layer of oil while helping remove minor residue left from previous cooks.
Many owners include onions during their first cooking session.
Smash Burgers
Smash burgers are practically made for a Blackstone.
The combination of:
- High heat
- Cooking oil
- Beef fat
helps continue strengthening the seasoning.
Plus, they’re hard to resist.
Steak
A properly seasoned Blackstone develops an outstanding crust on steak.
The cooking oils and rendered fat contribute to the seasoning while producing fantastic flavor.
Vegetables
Vegetables cooked with a light coating of oil also help maintain the surface.
Favorites include:
- Zucchini
- Mushrooms
- Bell peppers
- Asparagus
- Broccoli
Blackstone Seasoning Tips From Experienced Owners
Spend a few minutes talking with longtime Blackstone enthusiasts and you’ll notice several habits they all seem to share.
Always Use Thin Oil Layers
I know I’ve mentioned this several times.
That’s because it’s the single biggest factor in successful seasoning.
If you remember only one thing from this guide, remember this:
Thin coats beat thick coats every single time.
Don’t Chase a Perfectly Black Surface
This surprises many beginners.
A brand-new Blackstone rarely becomes jet black after one seasoning session.
Instead, the color develops gradually.
Expect:
- Brown
- Dark brown
- Patchy black
- Eventually a rich, even finish
Cooking naturally improves the appearance.
Cook Often
Regular use is one of the best maintenance routines.
Frequent cooking:
- Strengthens seasoning
- Improves food release
- Helps prevent rust
A Blackstone that’s used regularly often requires less restoration than one that sits unused.
Avoid Harsh Cleaning Methods
One mistake many new owners make is trying to make the griddle shine like stainless steel.
Don’t.
Removing all of the seasoning defeats the purpose.
Instead:
- Scrape food residue.
- Wipe clean.
- Apply a light coat of oil.
That’s usually all it needs.
Keep It Covered
Moisture is one of the few things that can quickly damage a well-seasoned griddle.
Whenever the grill isn’t in use:
- Use a quality cover.
- Store it in a dry location when possible.
- Keep water from collecting on the cooking surface.
Blackstone Grill Maintenance Checklist
Following a simple routine keeps maintenance easy.
Before Every Cook
Take a quick look at the cooking surface.
Check for:
- Rust
- Dirt
- Debris
- Dry spots
If everything looks good, preheat the griddle and start cooking.
After Every Cook
This routine usually takes only a few minutes.
Scrape the Surface
Remove:
- Food particles
- Grease buildup
- Burnt residue
Wipe Clean
Use paper towels or a clean cloth to remove remaining debris.
Apply a Thin Coat of Oil
Spread a very light layer across the cooking surface.
This helps protect the seasoning until the next cook.
Allow the Griddle to Cool
Avoid placing the cover on a very hot grill.
Let it cool naturally before storing it.
Weekly Maintenance
If you cook frequently:
- Inspect the seasoning.
- Check for sticking.
- Look for signs of rust.
- Tighten any loose hardware on the grill if needed.
A quick inspection can catch small issues before they become larger problems.
Monthly Maintenance
Take a few extra minutes to:
- Clean grease trays.
- Inspect burners.
- Check ignition components.
- Wipe exterior surfaces.
Remember that caring for the entire grill—not just the cooking surface—helps extend its lifespan.
Seasonal Maintenance
Before storing the Blackstone for an extended period:
- Clean the cooking surface thoroughly.
- Apply a protective oil coating.
- Empty grease containers.
- Cover the grill securely.
If possible, store it somewhere protected from excessive moisture.
My Favorite Blackstone Habit
One thing I admire about experienced griddle owners is how simple their routine becomes.
After every meal, they don’t spend an hour scrubbing.
They:
- Scrape.
- Wipe.
- Apply a little oil.
- Cover the grill.
That’s it.
Five minutes of maintenance often prevents hours of restoration later.
Frequently Asked Questions, Summary, Final Tips, Disclaimer, and SEO Metadata
Congratulations!
You’ve made it through the complete guide to seasoning a Blackstone grill.
If you’re a first-time owner, you probably realize by now that seasoning isn’t just a preparation step—it’s one of the most important things you can do to improve your cooking experience and protect your investment.
The great news is that once you’ve seasoned your griddle correctly, keeping it in excellent condition becomes much easier.
Let’s wrap up by answering some of the most common questions Blackstone owners ask.
Frequently Asked Questions
You can, but it isn’t usually the best choice for the initial seasoning.
Many experienced Blackstone owners prefer oils with higher smoke points, such as:
Avocado oil
Grapeseed oil
Canola oil
Peanut oil
Vegetable oil
Extra-virgin olive oil has a relatively lower smoke point, making it less ideal for building the first seasoning layers.
There isn’t one perfect answer for everyone, but some of the most commonly recommended options include:
Avocado oil for its very high smoke point.
Grapeseed oil for smooth, even seasoning.
Canola oil because it’s affordable and widely available.
Vegetable oil as a dependable all-around option.
Any quality high-smoke-point oil can produce excellent results when applied correctly.
Most first-time seasoning sessions take roughly 45 minutes to 1½ hours, depending on:
Griddle size
Number of seasoning coats
Heating time
Weather conditions
Taking your time usually produces better results than rushing.
A sticky surface is almost always caused by one of these issues:
Applying too much oil.
Not allowing each coat to burn off completely.
Turning the burners off too soon.
Fortunately, this problem is usually easy to correct by reheating the griddle and allowing the excess oil to finish curing. In more severe cases, you may need to remove the affected buildup and reseason the surface using thinner coats.
Applying multiple thin coats generally isn’t a problem.
However, repeatedly applying thick layers of oil without allowing proper curing can create a gummy or flaky finish.
Focus on quality rather than quantity.
Your Blackstone will usually give you a few clues.
Watch for:
Rust spots
Food sticking more than usual
Dry gray areas
Flaking seasoning
Uneven protection
Addressing these signs early keeps restoration simple.
Yes.
Most Blackstone owners lightly season the sidewalls and interior edges of the cooking surface because they’re also made of steel and can benefit from corrosion protection.
Follow your owner’s manual for any model-specific recommendations.
Butter is excellent for cooking.
It isn’t ideal for building the initial seasoning.
Because butter contains milk solids that burn relatively quickly, it doesn’t create the same durable protective coating as high-smoke-point cooking oils.
Save the butter for your pancakes.
Summary
Properly seasoning a Blackstone grill is one of the best investments you can make in its long-term performance.
Throughout this guide, we’ve covered:
- What seasoning actually does.
- Why seasoning protects against rust.
- The best oils to use.
- When your Blackstone should be seasoned.
- How to prepare the cooking surface.
- A complete step-by-step seasoning process.
- How many coats to apply.
- Common mistakes to avoid.
- How to maintain the seasoning.
- How to restore a rusty griddle.
- Troubleshooting sticky, flaky, or uneven seasoning.
- The best foods for strengthening the seasoning.
- A simple maintenance routine that keeps your Blackstone performing at its best.
The biggest lesson is surprisingly simple:
Consistency beats perfection.
You don’t need a flawless jet-black finish after your first seasoning session.
Regular cooking and proper maintenance will naturally improve the surface over time.
Final Thoughts
When I bought my first Blackstone, I honestly thought seasoning would be the most boring part of owning it.
It turned out to be the exact opposite.
Once I understood how the process worked, I realized I wasn’t just preparing the griddle for one meal—I was building a cooking surface that would improve every time I used it.
That’s one of the things I enjoy most about cooking on a Blackstone.
Unlike many kitchen tools that slowly wear out, a well-maintained carbon steel griddle often gets better with age.
Each breakfast, burger night, or weekend cookout adds another layer of protection and character.
So don’t stress if your griddle isn’t perfectly black after the first seasoning session.
Keep cooking.
Keep maintaining it.
And before long, you’ll have the kind of smooth, naturally nonstick cooking surface that makes owning a Blackstone so enjoyable.
Disclaimer
This guide is intended for informational purposes only. Always follow the instructions provided in your Blackstone owner’s manual for your specific model. Seasoning methods, maintenance recommendations, and acceptable cooking oils may vary slightly between products. Exercise caution when working around high heat, hot oil, and open flames, and use appropriate protective equipment during the seasoning process.